Working With Tables in an Email Template
This short guide provides more detail on how to use the Email Template Designer in pbSmart Connections. Here, we show you how to add and configure tables in your email template.
To get started, open a saved email campaign or create a new one to bring up the main Email Template Designer window. To open a saved campaign, see the My Emails page under the Email tab and click the pencil icon next to your campaign to start editing it. To create a new campaign, click the Create Email button in the top right of the same page. For help on creating a new campaign, see our article: Creating Email Templates with the Email Template Designer.
You should now see the main editor window of the Email Template Designer. Click the Insert menu dropdown to reveal a list of all the items you can add to your email design: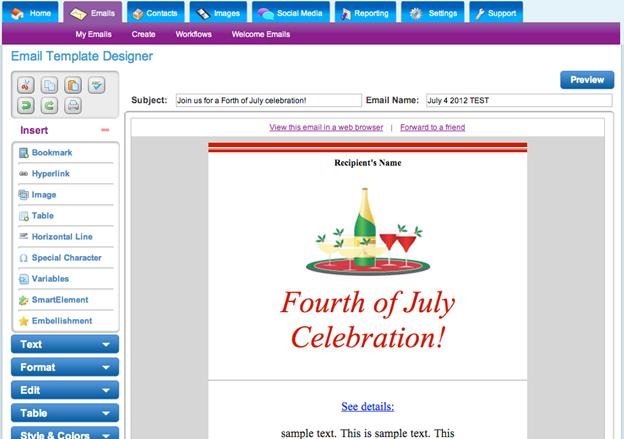
To add a table to your design, position your cursor at the spot you’d like your table to appear and click the Table button.
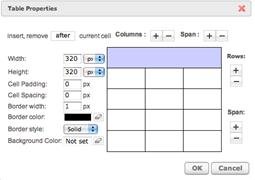
The Table Properties window will appear, listing all the options available to configure your new table. 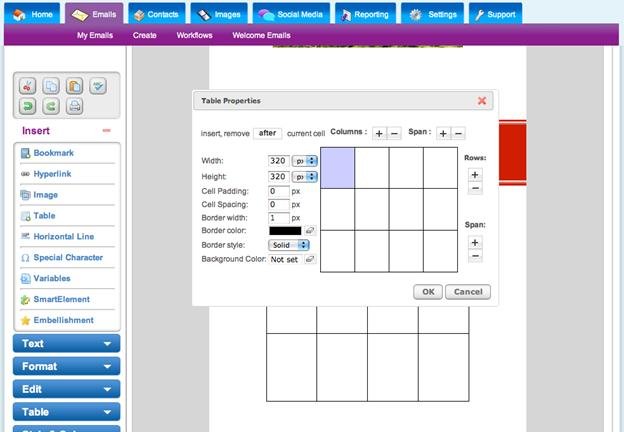
By default, pbSmart Connections will create a table that is 4 cells wide by 3 cells tall.
Within the Table Properties window, you can: 1. Add or remove rows and columns
After adding a table, you can also right-click within each individual cell to bring up the Cell Properties window, where you can:
2. Merge or un-merge cells
3. Specify the height and width of your table
4. Select a background color for your table
5. Set the style, width and color of the table borders1. Choose the horizontal and vertical alignment
We’ll take a look at each of these settings in detail, starting with the Table Properties window.
2. Set the height and width for the cell
3. Choose a specific background color or image for the cell
Adjusting Table Properties
1. Table Properties Window: Add or remove rows and columns
Before adding or removing rows or columns, we first need to choose a reference point. Click any of the cells in the preview to highlight it in blue. This is your reference point.
Next, at the top of the Table Properties window, you will see a box with a thin-blue border, inside of which is the text “after”. Click this box to toggle between “before” and “after”, which determines where rows or columns will be added in relation to your reference point:
Once you have made your selection and chosen your reference cell, adding and removing rows and columns is easy. Use the Column +/- and Row +/- buttons to adjust your table until it has the right number of rows and columns. 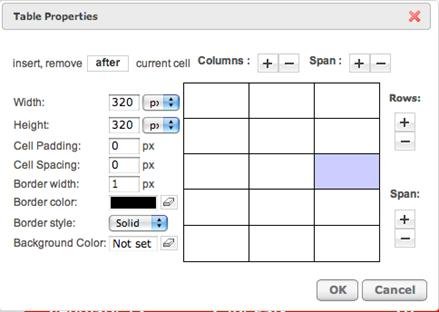
2. Table Properties Window: Merge or un-merge cells
At times you may want to merge some of your table cells, for example, to create a table “header” that runs across the top of your table. To merge cells, first choose a reference cell, and then use the Span +/- buttons to merge/unmerge the cell with the one adjacent to it. The Span button at the top of the preview will merge/unmerge your reference cell with the cell to the right of it. The Span button on the right of the preview will merge/unmerge your reference cell with the cell just below it.
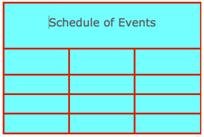
For example, to create a table header that runs across the top of our table, first click the cell in the top-left of the table. Then click the Span + button to merge the cell with additional cells to the right, until you have created your header. In this case, we clicked the Span + button twice. 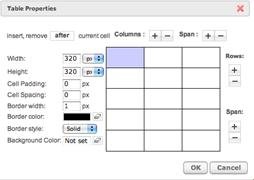
To remove your table header, simply click the Span - button until you restore all the original cells.
3. Table Properties Window: Specify the height and width of your table
Adjusting the width and height of your table is easy. First, decide if you want to use fixed dimensions specified in pixels, or relative dimensions specified as a percentage of space available. Use the dropdown boxes provided to toggle between the two choices. Next, enter the values for each the Height and Width text boxes.
For example, you could choose to make your table fill 80% of the available width, but fix the height at 400 pixels.
In this case, we have chosen a table that is 450 pixels wide by 300 pixels high. 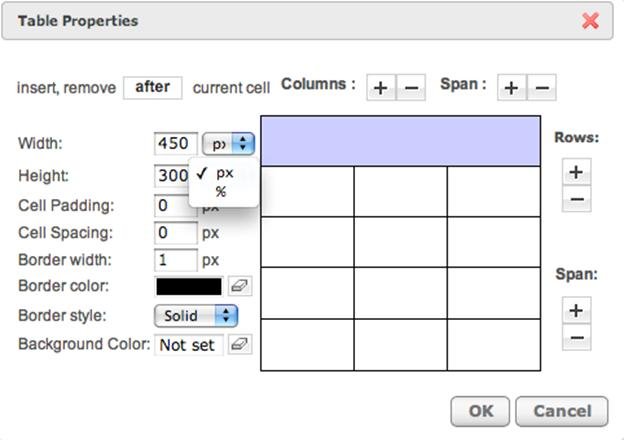
4. Table Properties Window: Select a background color for your table
To change the background color of your table, click the box next to the words “Background Color” and click a color from the palette provided, or enter a hex value, then click the Set button and click OK. Use the eraser button in the Table Properties Window to clear the table background. 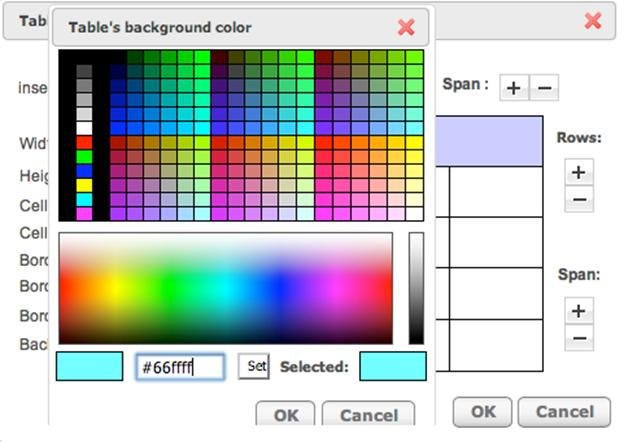
5. Table Properties Window: Set the style, width and color of the table borders
To adjust the borders of your table, enter the Border Width in pixels into the text box provided. Click the box next to the words “Border color” to select a color and click OK. In the Border Style dropdown menu, you can select from the following styles: None, Dotted, Dashed, or Solid.
In this example, we have chosen a solid red border that is 4 pixels wide: 
6. Table Properties Window: Set the amount of padding within cells and amount of space between them.
To complete the table configuration, you can adjust how much space to leave around your text or images within each cell (Cell Padding), and how much space to leave between cells (Cell Spacing).
Simply enter the amount of each property (in pixels) in the text boxes provided.
In this example, we have chosen to leave 5 pixels of space around the text within each cell, and no space between cells.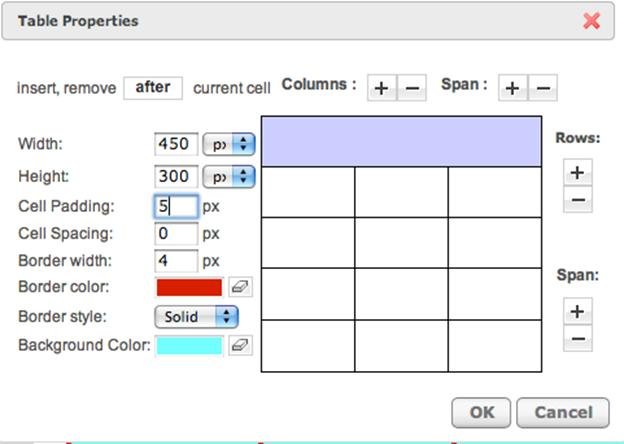
When you have finished configuring your table, click the OK button to return to your email template, where you will see your new table, as shown below with our example.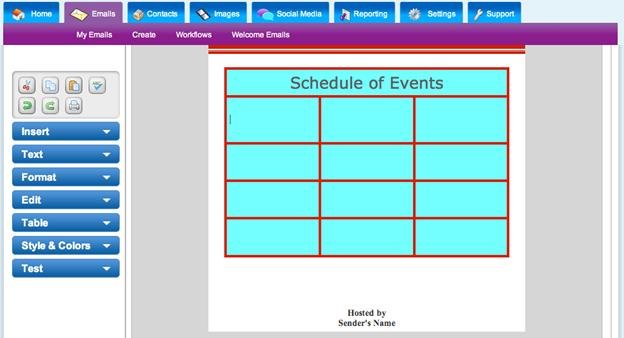
Adjusting Individual Cell Properties
After creating your table, you can adjust each individual cell by right-clicking within a cell and choosing “Cell Properties”.
1. Cell Properties Window: Adjusting horizontal and vertical alignment The two alignment dropdown boxes let you specify how text or images will be positioned within each cell. Use the Alignment dropdown to specify: left, center, or right justification. Use the Vertical Alignment dropdown to specify: top, middle, bottom or baseline placement.
In the example below, we have chosen to align the text of our table header in the center-middle of the cell. 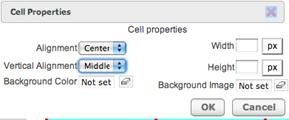
2. Cell Properties Window: Set the height and width for the cell
To set the minimum height and width for your cell, first click the buttons to the right of the Width and Height labels to toggle between pixels and percentage values. Then enter the values in the text boxes provided. In this example, we have set the width of our table header to 100% and the minimum height to 30 pixels. 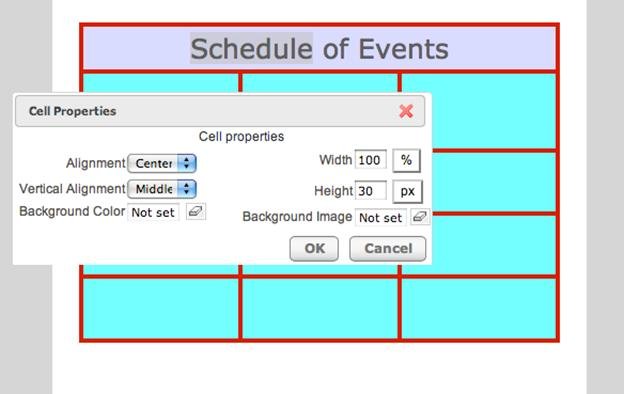
3. Cell Properties Window: Choose a specific background color or image for the cell
You can adjust the background of individual cells by choosing a color or background image. To choose a color, click the box to the right of the words, “Background Color” and either select a color or enter a hex value and click OK. You can use the eraser button to clear the background.
To select a background image, click the box to the right of the words, “Background Image”, and in the pop-up window that appears, you will be prompted to enter the full URL of the image. Use the dropdown boxes provided to specify where in the cell you want the background image to be positioned horizontally (left, center, right), and vertically (top, middle, bottom.). Use the Repeat dropdown box to specify if you want the image to repeat horizontally (“repeat-x”), vertically (“repeat-y”), or both (“repeat”). Use the Attachment dropdown box to specify if you want the image to remain in a fixed position relative to the cell (“fixed”) or to move along with the other items in the cell if the reader is scrolling through a large list (“scroll”). Click OK to finish. 
That concludes our walkthrough of how to add and configure tables in the Email Template Designer. To learn more about adding items to your email template, see our other articles: How to Add Hyperlinks, Images, Smart Elements and more, and personalizing your email template using your database fields.